Quick Links
The Great Winemaking Tax Revolt
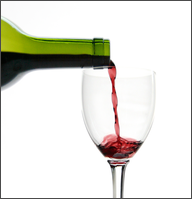
Make your own wine and stop buying a round for the government.
In many parts of the western world, the cost of a bottle of wine consists primarily of tax. If you feel like there's a laughing politician watching you every time you raise a glass, you might want to consider making your own. It's easy, your wine will taste better than its commercial cousins, and the resulting beverage will embody less of a tax component than a bunch of grapes.
The most historically-significant extension of the influence of government into the sphere of raising a glass of something intoxicating and having a good time is inarguably the eighteenth amendment to the constitution of the United States, enacted on January 16, 1920, which prohibited the “...manufacture, sale, or transportation of intoxicating liquors within, the importation thereof into, or the exportation thereof from the United States.” History and documentary film-makers know it as “Prohibition.”
Prohibition was a breathtakingly wrong-headed, misguided and generally lame idea — it did little to ameliorate the perceived social issues brought about by the consumption of alcohol, but it did give rise to an enormously powerful and wealthy class of outlaws, who got powerful and wealthy by smuggling booze past the G-men.
The twenty-first amendment to the constitution of the United States, enacted on December 5, 1933, repealed the eighteenth amendment, and ended a decade of bathtub gin, speakeasies, automatic weapons and lurid headlines. History has largely forgotten that the repeal of Prohibition began with a New York socialite named Pauline Sabin. While she evinced a number of compelling reasons for the cessation of the government’s war on liquor, her most effective argument by far was the very large pile of cash that several levels of government might enjoy by being able to tax the sale of strong drink.
Many western countries have toyed with prohibition at times, but by the early- to mid-twentieth century, most of their governments had decided that given the choice between a sober populace and a great deal of tax revenue, they’d take the cash.
As with most taxes, the tax on alcohol started at a modest level and swelled with each successive administration that found itself strapped for revenue... which would be pretty much all of them. While the egregiousness of liquor taxes varies to some extent between jurisdictions, they typically look pretty savage when they’re revealed in their entirety. Most governments that tax strong drink have the sense to insist that its various tax components be hidden in the final prices paid by its consumers.
In the nanny-state socialist tax ’n spend command economy where I live, about 65 percent of the price of a bottle of wine is contributed by various taxes, fees and government cash-grabs. A bottle of wine that sells for $10.45 up here has the following price breakdown:
Cost of the wine: | $3.77 | |
Transportation: | $0.17 | |
Government: | $6.60 |
The government’s cut consists of a variety of duties, charges, levies and environmental fees, with two levels of sales tax charged on the whole amount. Add twenty cents for the bottle deposit, which can be recovered if you don’t mind blowing several dollars worth of gasoline to drive the bottles in question back to an entirely different store.
If enough media surround the minister responsible for our stratospheric liquor prices to preclude a quick getaway, they’ll usually be told that the government’s interest in making strong drink expensive is primarily to keep people from consuming too much of it. The current minister as I write this can make this pronouncement without a ghost of a smirk, which bespeaks an admirable command of theatrical skills.
Pressing governments to dial back taxes is typically about as effective as petitioning gravity to cease pelting the earth with asteroids. The addictive qualities of liquor are as nothing when they’re compared to the addiction of governments to wanton spending.

For consumers of wine, Prohibition offers a second if somewhat less obvious lesson. While a considerable number of Americans during the 1920s frequented speakeasies and courted rum-runners to obtain their tipples of choice, a largely ignored class of drinkers descended to the solitudes of their respective basements, sprinkled some yeast into vats of grape juice and quietly made their own wine. The G-men rarely bothered them.
Winemaking is a good deal easier and more reliable now than it was a century ago, but it offers a comparable benefit. The preposterous levels of tax imposed on wine aren’t a blight upon the raw ingredients that give it birth. Where I live, grape juice for making wine is considered to be a foodstuff — it’s not even subject to sales tax.
With a one-time investment of about two hundred dollars worth of equipment and fifty to sixty dollars per batch for a wine kit, it’s possible to brew the equivalent of about seven hundred dollars worth of eminently drinkable wine... at least at our wine prices. While the savings you’ll experience will be predicated to some extent upon the rapaciousness of your government, if you enjoy a glass of wine with dinner most evenings, you can easily save a significant stack of coin by making it yourself.
When it’s done well, homemade wine can taste as good as or better than commercial table wines. As you progress in the craft of winemaking, you’ll be able to refine your drink to suit your taste, adjusting its flavor and alcohol content as you see fit. Drinkers with an overweening concern for environmental issues will appreciate that homemade wine typically involves reusing the same bottles — rather than manufacturing new ones on a regular basis and then having the government pretend to recycle them — as well as enjoying the carbon footprint of a malnourished tree frog.
Homemade wine is typically more full-bodied and flavorful than its commercial cousins, for reasons to be touched on later in this article.
Wine drinkers who pay attention to the contents of the foods and beverages they consume will unquestionably appreciate the opportunity to review and control the chemistry used in creating the wine they drink. For example, some commercial wine uses charred animal bones as a fining agent — we’ll get to what a fining agent is presently. Wine kits, as a rule, use bentonite for this purpose, bentonite being refined volcanic clay. While neither substance constitutes an ingredient of wine — fining agents end their days in the sediment left at the bottom of a fermentation vat — you may be more comfortable with your drink coming contact with clay, rather than meat-packing plant byproducts.
Perhaps best of all, you’ll be able to drive past the retail outlet from which you hitherto bought wine and contributed to the pensions of your elected officials, and proffer a raised finger at same. Some days, this is easily the most enjoyable bit.
The lawyers made us say this: Everything at this web page is offered “as is” and without a warranty of any kind. While we’ve undertaken to make this article accurate to the best of our abilities, neither Alchemy Mindworks, its suppliers, its shareholders, its employees or the author of this page accept any responsibility for any loss, damage or expense that you incur as a result of your use of the information herein, however it occurs. You agree to indemnify, hold harmless and defend Alchemy Mindworks, its suppliers, its shareholders and its employees and the author of this page from and against any claims or lawsuits, including attorney's fees, that arise or result from your use of the information herein. None of the legal issues to be discussed in this article should be regarded as informed legal council. In the event that some of them have a legal bearing on you or on your use of the information herein, you need to discuss them with a real lawyer. Neither Alchemy Mindworks, its suppliers, its shareholders, its employees or the author of this page undertake to provide support in any form for any reason for your activities based in whole or in part upon the information provided at this page. If you are unwilling or unable to agree to these terms, please click on BACK now.
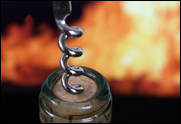
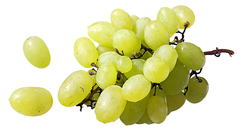
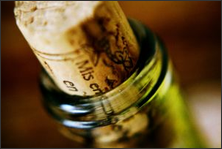
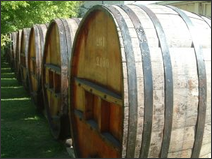
STOMP THOSE GRAPES
In ages past, wine began with grapes. This was brutish, primitive and messy. In the new millennium, wine begins with a cardboard box.
Traditionally, winemaking involved growing grapes, crushing the grapes to extract their juice and then fermenting the resulting grape juice to generate alcohol. This pretty much demanded that putative winemakers have access to a vineyard, as buying enough grapes from your local supermarket to make a batch of wine would dent your plastic way more than springing for a comparable amount of commercial drink.
The price of fruit as it appears in a supermarket is largely the cost of transporting and storing a somewhat perishable commodity.
Most casual winemakers begin not with grapes, but with concentrated grape juice. Actually, most casual winemakers begin with a wine kit, which consists of a big udder full of grape juice and a plastic bag with packets of the other ingredients required to complete a batch of wine.

There are a lot of wine kits available, and the worst of them are still a lot easier than crushing grapes and guessing how much yeast to add to the resulting purple swamp. We use On The House wine kits by a company called Vineco — the product name is a bit confusing, as at something north of fifty dollars for one of these kits as of this writing, nothing about them could reasonably be described as “on the house.” None the less, Vineco’s stuff seriously rocks.
Vineco’s wine kits come with concentrated grape juice, packets of yeast and other ingredients and agreeably lucid, step-by-step instructions for turning the whole works into wine. They describe their product as a “twenty-eight day wine kit,” which is arguably a bit misleading. It takes about a month to complete one, but you’ll want to leave the resulting wine alone in its bottles for about two months after the last of the plastic accessories has been washed and put away before you consider drinking it.
Age is the unspoken secret ingredient in good wine.
It’s worth noting that you can buy wine kits that will let you brew up surprisingly faithful reproductions of a variety of popular wines — chianti, merlot, chardonnay, valpolicella and so on. The specific species of grapes that give birth to these traditional wines all grow in North America as well as Europe, and a well-crafted wine kit will allow you to simulate the processes by which their commercial cousins are made.
In addition to a wine kit, you’ll need a modest stack of hardware to get the whole works bubbling. None of this technology is hugely expensive, but some of it is a bit specialized. It includes:

- A primary fermentor: This is in fact a food-grade plastic bucket with a lid, capable of containing at least 23 liters of liquid, or six US gallons.
- A large food-grade plastic bag: Lining your primary fermentor with a big plastic bag will improve your chances of crafting flawless wine, and make cleaning up the leftovers way easier. These things will be discussed in detail later in this article.
- A carboy: Looking very much like the sort of bottles that are uncertainly hoisted atop water coolers, a carboy is used to complete the fermentation process. Once again, it will need to have a capacity of at least 23 liters, which lets out water-cooler bottles. The word “carboy” comes from the Persian word qaraba, which means “big jug.”
- A siphon tube: This is a length of food-grade plastic tube. Four to six feet of tube is usually about right. Half-inch diameter tube is ideal for this purpose.
- An Autosiphon: In theory, you can start a siphon by sucking on the low end of the tube you’re using. In practice, it’s extremely tricky to make this work without getting your face covered in wine. Doing so also risks contaminating your wine with any bacteria that happens to be stuck to your lips at the time. An Autosiphon is a food-grade piston and cylinder that drops into your wine and connects to a siphon tube. Run the piston up and down a few times and it will start your siphon with no unexpected physiognomic flooding. The Autosiphon is made by a company called Fermtech, and is available through most winemaking shops.
- A bung and an air lock: A bung is a rubber cork with a hole in it. An air lock is a plastic device that permits gas to escape from whatever the aforementioned bung has been bunged into — this being your carboy, in the case of winemaking — but prevents air and its attendant contaminants from sneaking in.
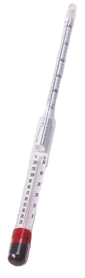
- A hydrometer: You do get to use some cool specialized glass stuff in wine-making. A hydrometer is a sealed glass tube with a weight in the bottom and a calibrated scale inside the tube. Because water is more buoyant than alcohol, a hydrometer will float lower in a vat of wine as its alcohol content increases. This device will let you measure the degree to which the fermentation of a vat of wine has proceeded.
- A floating thermometer: Fermentation is somewhat temperature sensitive, and it’s important to allow your initial wine components to arrive at a suitable temperature before you fling yeast at them and enrage the ghosts of departed prohibition agents.
- A bag of potassium metabisulfite crystals: We’ll get to this bit of chemistry next.
- A potted plant dolly: This is not a décor item — you might decide you want one to assist you in moving large, unwieldy containers sloshing about with 23 liters of wine therein.
- An Avvinator: This is a seethingly clever device for sterilizing wine bottles. It will turn up in greater detail toward the end of this article.
- A bottle-washing valve: This is another breathtakingly clever device — this one washes the sterilizing solution out of wine bottles, leaving them ready for filling.
- A bottling tube: This is a short plastic tube with a valve in the end, to allow your wine bottles to be filled with wine and your kitchen to remain sober.
- A corking machine: Be sure to read ahead for this one — good corking machines are a pleasure to behold and a joy to operate. Bad corking machines are the tools of unclean spirits.
Most towns large enough to enjoy their own traffic lights have at least one winemaking shop. You’ll want to track one down in your vicinity. For reasons which probably require little explanation, these establishments are almost universally operated by friendly, jovial people who clearly love their work. They’ll be happy to sell you all the aforementioned paraphernalia required to populate your own cellar, and advise you about the nuances of the craft of fermenting your favorite tipple.
As an aside, in addition to winemaking stores that sell the supplies required to make wine at home, a growing number of business have arisen of late that will allow you to brew wine on their premises. They’ll rent you a fermentation vat and a carboy, sell you a wine kit and walk you through the process of mixing the juice concentrate, adding the yeast and other chemistry and racking and then bottling your wine. Because the whole circus will take place in a wine store, rather than in your kitchen, and you’ll have a presumably knowledgeable staff member hovering behind you to hold your hands and tell you when to wash them, you’ll be all but guaranteed a successful batch of wine.
The most prominent of these not-exactly-home-made wine stores is WineNot, which has hundreds of locations across North America.
In-house winemaking is well worth considering if the prospect of making your own wine seems intimidating, but it’s important to note that the cost of making wine this way will be substantially higher than brewing up a batch at home. All that expertise and temperature-controlled rack space doesn’t come cheap. Your numbers will likely vary — our cost for a wine kit is just over fifty dollars, while a batch of wine from the local in-house winemaking shop would come in above two-hundred.
It should also be said that making wine at home probably dates back five or ten thousand years. It’s not a trivial undertaking — at least, not if you anticipate being able to drink the stuff — but it’s hardly rocket science. If you can follow simple instructions and you’re not unreasonably dangerous with plastic tubes and a corking machine, you can make your own wine without professional guidance.
Some winemaking shops — including the one we use — offer both services. They sell supplies as well as offering to let you brew up a batch of wine on the premises.

Finally, while it’s far from essential, creating an appropriate atmosphere in which to create wine is well worth the effort. Try to avoid decorating your kitchen with bunches of plastic grapes, etchings of the Roman god Bacchus or rows of empty Chianti bottles. We like to play some prohibition-era jazz — Frankie Trumbauer and his orchestra constitute the house favorite as of this writing.
This said, choose any tunes that you feel underscore the presumption that people who work for a living will always prove more resourceful than politicians.
IT'S ALL IN THE BOX
If there were a formal motto for winemaking, it would be this — sterilize everything. The single most common cause for batches of homemade wine to emerge from their bottles as undrinkable purple sludge is bacterial contamination during fermentation. Once you get this issue by the throat, you can make superb wine without having to later fear extracting its corks.
Sterilize everything.
The medium by which winemaking equipment is sterilized is a solution of sodium or potassium metabisulfite, usually referred to as “sulfite crystals.” Sulfite crystals are typically sold in plastic bags — by one of the aforementioned winemaking shops — and can thereafter be dissolved in water. While you’ll want to consult the packaging for yours, sulfite crystals are usually mixed three tablespoons of crystals to four liters of water.

To sterilize an item of winemaking equipment, rinse it thoroughly in your sulfite solution, and then in clear water to remove the sulfite. Allowing significant amounts of sulfite to get into your wine will spoil it pretty much as effectively as bacteria.
Before you begin creating a batch of wine, you’ll want to give some serious thought to the equipment you’ll be using, the other surfaces which could come into contact with your wine and how to sterilize everything involved. Here are some examples:
- If you’ll be fermenting wine in a carboy, you’ll want to sterilize the inside of the carboy — somewhat obvious, this.
- If you’ll be plugging the neck of your carboy with a bung, you’ll want to sterilize the bung.
- If you’ll be siphoning wine from one container to another — which happens at least twice during the fermentation process — you’ll want to sterilize the inner and outer surfaces of your siphon tube.
- If you need a spoon to mix ingredients into your wine, you’ll want to sterilize the spoon.
- If you anticipate having to put a piece of sterilized apparatus down for a moment, you’ll want to make sure the surface it will rest upon has been sterilized.
- If you’ll be handing equipment during the process of making wine, you’ll want to sterilize your hands.
Sterilizing your hands is one of the most frequently overlooked issues in making wine — which is a pig, as people carry a lot of bacteria around with them.
The sulfite solution used to sterilize winemaking equipment is sufficiently toxic to kill bacteria, but not so nasty as to pose a health risk to the people working with it. This said, if you get a lungful of the fumes released by a fresh batch of sulfite, you’ll know it. I discovered early on that my skin is mildly allergic to the stuff, and that prolonged contact with sulfite solution made my hands look like they’d recently detached themselves from my arms and spent an afternoon on the beach without bothering with sunblock. At times I wear disposable food-grade plastic gloves when I’m working with sulfite, and sterilize the exterior surfaces of the gloves.
Sterilizing everything you work with while you’re making wine is easily the most time-consuming aspect of the process. It’s also the most demanding of your attention — you should make every effort to get seriously paranoid about the prospect of anything, however minute, coming in contact with your wine without its first having been sterilized. This, more than anything, is what separates great amateur winemakers from embarrassed idiots.
When you rip the top from a wine kit, you should find a large plastic udder full of concentrated grape juice, a plastic bag with various packets of chemicals — all clearly marked with inscrutable names which will become clearer in time — and an instruction sheet. The instruction sheet that comes with Vineco’s wine kits, mentioned earlier, is relatively easy to follow, but somewhat terse.
Before you start mixing the ingredients of your wine kit and laughing maniacally in the style of a depraved scientist from a circa-1930 low-budget horror flick, you should calibrate your primary fermentor. Please avoid the temptation to say “bring me the primary fermentor, Igor,” in a heavy eastern-European accent.
A wine kit typically makes 23 liters of wine, but in arriving at this volume, you’ll be instructed to empty the kit’s grape juice concentrate into your primary fermentor and then add sufficient water to bring the total volume to 23 liters, or six US gallons, rather than being told to add a specific volume of water. As the actual volume of water required will vary a bit, depending upon how much water you use to wash out the grape juice udder, you’ll want to have previously drawn a line around the top of your primary fermentor to indicate 23 liters.
Unless you bought a fermentor with volume markings printed on it, find a large measuring cup and measure 23 liters of water into your primary fermentor. Mark the exterior of the primary fermentor at the level where the water stops, and then empty it.
As an aside, it’s worth mentioning that while pretty much any container that can hold 23 liters of water could be used as a primary fermentor, you should blow the ten to twenty dollars involved and buy a food-grade plastic fermentor from a winemaking shop for this purpose. In fact, all the plastic parts that are used in making wine should be food-grade plastic. This will address the issue of potentially nasty substances leeching themselves into your wine and potentially spoiling your drink or making you sick.
An official primary fermentor looks a great deal like a plastic paint bucket from Home Depot, with a lid that snaps over the top. Whatever you do, don’t snap the lid onto yours — they’re a bear to remove.
While the instructions that come with wine kits don’t mention them as a rule, you can make the process of initially fermenting your wine a lot less error-prone — and the resulting cleaning up way easier — if you line your primary fermentor with a large food-grade plastic bag, also available from most winemaking shops. These things cost about a dollar, and can only be used once. The eco-left that typically rises up once or twice a year to decry plastic shopping bags as the most insidious agents of global environmental devastation yet devised by human beings will no doubt run screaming from the room at the thought of wantonly disposing of all that plastic after just one use, but it’s worth doing none the less.
In classical wine making — which involved grape juice entirely derived from stomping the grapes that grew it — no substantial volume of water got involved in the process. Wine kits use concentrated grape juice, in which some of the original water from the juice has been evaporated to make the whole works smaller, lighter and more cost-effective to transport. The first step in beginning a batch of homemade wine from a kit is replacing the missing water. A significant degree of discussion and invective surrounds the choice of water for this purpose.
You can obtain the water to use with a wine kit from one of two obvious sources:
- A faucet.
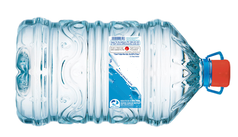
- A big bottle of spring water.
There’s nothing inherently wrong with using tap water to make wine from a wine kit, but there are some important considerations in doing so.
- If your taps are connected to a municipal water supply, the water that emerges from them almost certainly contains chlorine, and chlorine will prevent the yeast that’s intended to make your wine ferment from working. If you’re using city water, you’ll want to draw a suitable quantity of it into a large, food-grade container and let it sit there for about a day, so its chlorine dissipates.
- If your taps are connected to a private well, you’ll want to give some thought to the minerals dissolved in your water, and its bacterial content. A professional water sample analysis might not be a bad idea if you’re unsure what’s floating around therein. Should your water appear to be some color other than wholly clear, you should assume that there are unworkable levels of minerals dissolved in it. High iron concentrations, for example, are pretty much fatal to winemaking.
- You can’t make wine with water that’s been through a water softener — water that’s been softened through an ion exchanger typically lacks magnesium, a dearth of which upsets yeast. Most contemporary water softeners are installed with a bypass valve — you can temporarily switch the water softener out of your plumbing, run your taps for a few minutes to get past whatever soft water is lurking in your pipes and you’ll be good to go.

If your tap water is unsuitable for winemaking — or even if you just suspect it might be — you can eliminate any potential issues with it by using reverse-osmosis bottled spring water. It’s worth pointing out that while a large bottle of spring water holds about 18 liters of water and a wine kit makes 23 liters of wine, you’ll only need one bottle of spring water. The concentrated grape juice in a wine kit accounts for between six and seven liters.
Tap water is, as a rule, way too cold to support fermentation, and you’ll need to address this. The first step in starting a wine kit, then, is to mix its grape juice and enough water to bring the total volume to 23 liters. You’ll also want to add some of the initial chemistry to your wine, to wit:
- Bentonite: Bentonite is a volcanic clay, and not a mysterious substance from the planet Benton believed to teleport selected humans having red hair and long fingernails to an alternate reality. It’s used in winemaking as a clarifier. It will attract particles suspended in your wine, such that as the bentonite settles to the bottom of your primary fermentor, so will whatever sticks to it.
- Oak granules: Some wine attains its unique flavor by virtue of its having been aged in oak casks. Check your basement — you probably don’t have an oak wine cask lying about. These things are actually remarkably expensive. Wine kits cheat around this problem by providing packages of oak granules — which lay people will no doubt regard as “sawdust” — to be added to your wine as it’s fermenting. As with the bentonite clarifier noted above, the oak granules will eventually settle to the bottom of your primary fermentor and get trashed, but not before they flavor your wine.
- Elderflowers: Elderflowers are the flowers of elderberry shrubs. They add a fruity taste to those wines that include them.
Not all species of wine use the latter two ingredients.
Stir everything with a large sterilized plastic spoon, and leave the whole works for about a day, until the temperature of your putative wine has risen to whatever the instructions included with your wine kit specify — typically 20° to 25° centigrade, or 68° to 77° Fahrenheit.
As an aside, the Vineco wine kits we use, as noted earlier in this article, pack their grape juice in robust plastic bags with serious plastic caps that are very nearly impossible to remove, presumably such that they don’t spring open during transport. Getting the tops off them and their grape juice concentrate into your primary fermentor without covering yourself, your kitchen and the neighbor’s beagle in the stuff is something of an art form. It’s best accomplished by two people — one to hold the udder and the second to pry the cap off with a knife or a clean screwdriver. Be sure to sterilize whatever you attack it with.
You can now close your primary fermentor and dream of glasses of sparkling, fresh — largely untaxed — homemade wine. If you used a food-grade plastic liner, tie the neck of the bag closed with two twist ties. If you mixed up your wine in a primary fermentor without a liner, place the top on the fermentor with an airlock.
You should find somewhere suitable for your wine to reside while it’s fermenting. The ideal locale will be rarely visited by family members and pets, warm and likely to stay that way all the time, not subject to intrusion by sunlight and as free from dust and other contaminants as possible. In our case, we used a corner of a walk-in pantry. In has no windows, and it’s located more or less in the center of the house, so its temperature remains constant.
While basements are a traditional venue for making wine, yours might not be ideally suited to the task, depending upon where your basement resides. Some basements get pretty cold in the winter, ’specially at night, and this will inhibit the action of yeast.
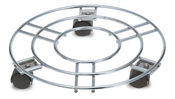
Twenty-three liters of water weighs a bit, and while you can wrestle a filled primary fermeter or carboy around if you really have to, you might want to spring for a set of wheels. The circular wheeled dollies used to support large potted plants are ideal for this purpose. They cost about five dollars.
After a day has elapsed, check the temperature of your primary fermentor.
You’ll want a floating thermometer to check the temperature of your primary fermeter’s contents. Be sure to sterilize the thermometer and your hands each time you do so. The floating aspect of this device is decidedly worthwhile, as if you manage to drop it into your fermentor unexpectedly, it will bob to the surface and be easy to recover, rather than plummet into the depths of your wine and not be heard from again for at least a week.
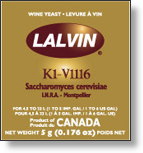
Once the contents of your primary fermentor have reached a suitable temperature, you can add the yeast that came with your wine kit. Sprinkle the yeast over the top of your wine, but don’t stir it.
You should determine the initial specific gravity of your wine by floating a sterilized hydrometer in it. The difference in specific gravity between the initial addition of yeast to your wine and its final descent into bottles will allow you to calculate its percentage of alcohol, and thereafter to forewarn any friends you choose to inflict your creation upon. More to the point, checking the specific gravity of wine in progress is pretty much the only way to know when it’s done fermenting.
The initial specific gravity of a batch of wine just after it’s been mixed and provided with yeast should be in the range of 1.080 to 1.095.
Once all the specified ingredients have been mixed into your wine, you should close your primary fermentor again — either gently tie the neck of your liner with two twist ties or place the fermentor’s cover loosely in place. Return your primary fermentor to wherever you’ve found to keep it out of harm’s way.
Patience is a vital component of winemaking.
FUN WITH SIPHONS
It takes about eight days for a batch of wine to complete its primary fermentation. Wine is somewhat entertaining in this state, as it typically bubbles and makes unusual noises for much of this time. While you shouldn’t remove the lid of your primary fermentor to peek at it, this activity will be visible if you used a clear plastic liner closed with twist ties.
In addition to its visual and auditory phenomena, wine engaged in fermentation produces a variety of aromas. As a rule, it will smell enticingly wine-like for the first few days, and then very much like a large vat of rotting fruit for the rest of the week. The latter smell may be disconcerting, leading you to suspect that things are not as they should be within your primary fermentor. Don’t be concerned — the smell will go away, and your wine is almost certainly maturing nicely.
After your wine has reclined and indulged in whatever it is that yeast finds amusing for at least eight days, you should open your primary fermentor — with sterilized hands — and drop an equally sterilized hydrometer into your wine to check its specific gravity. Over the previous week, fermentation should have turned a lot of the sugar in the grape juice from your wine kit into alcohol, which will have lowered the specific gravity substantially.
The specific gravity of your wine should be less than 1.010. If it hasn’t dropped sufficiently, close up your primary fermentor and check it again in a few days.
When the specific gravity of your wine has dropped appropriately, you’re ready to rack it into a carboy — that’s one of those specialized terms you get to use when you make wine. Racking wine involves siphoning it out of wherever it is at the moment to somewhere you’d prefer it was, while leaving any unwanted sediment behind.
You’ll want to sterilize the inside of your carboy, whatever tubes and other plumbing as you’ve assembled to siphon your wine... and, once again, your hands.
A brief digression upon the art of siphoning wine follows.
A siphon uses some very elementary physics to move liquids from a high container to a low container when it’s impractical to just pour stuff from the former to the latter. In earlier epochs, siphons were popular for stealing gasoline, as it’s largely impractical to upend a 1959 Chevy Biscayne over a portable gas can. A siphon used to abstract gasoline was referred to as an “Oklahoma credit card” in years past — it’s unclear why the residents of Oklahoma were unfairly singled out in this regard.
In winemaking, siphoning wine is preferable to pouring the stuff because a well-managed siphon can remove the liquid from a container without disturbing any sediment that’s descended to the bottom thereof.

A siphon works by creating a vacuum. Once liquid starts flowing through a tube from a high container, the force of the liquid in the tube as it falls draws more liquid up the tube, over the top of the tube and into the descending portion of the tube. As long as the vacuum remains — which is to say, as long as the opening at the top of the tube is submerged in the liquid being siphoned — the siphon will keep running.
The tricky part in using a siphon is getting the beast started. Traditionally, a siphon is started by sucking on the lower end of a siphon tube until the liquid being siphoned is just about at lip level, and then hastily dropping the lower end of the siphon tube into the container intended to be filled by it. This is likely to make you really sick if it goes wrong while stealing gasoline, and it doesn’t work at all well for racking wine, either.
In that part of the purpose of racking wine with a siphon is to extract your wine from its primary fermentor and leave its sediment behind, having your siphon tube thrashing about while you’re trying to get it started and then quickly dropped into the neck of your carboy before it redecorates your kitchen is likely to prove counterproductive. At best, it will stir up the sediment in the bottom of your primary fermentor, and unless the opening of your siphon is held just above the sediment level, it will probably inhale quite a bit of it, too.
Most winemaking shops will sell you a racking tube, which is a rigid plastic pipe with a cap at the end. The capped end of a racking tube can be lowered into your primary fermentor, and the other end connected to a siphon. The plastic cap will prevent the racking tube from sucking up sediment. The problem with a racking tube is that it requires its operator to suck enough wine up a two foot vertical pipe to reliably start a siphon. I work out every day, my lungs have been blowing into a tenor saxophone for most of my adult life and I still find this to be a bit of pig.
Our solution of choice for racking wine is a Fermtech Autosiphon, a combination siphon and pump, as noted earlier in this article. Costing about twenty-five dollars, these things make starting a siphon effortless. An Autosiphon has much the same sort of plastic cap as a racking tube, allowing it to siphon your wine while ignoring any sediment that’s settled out of it. Connected to a half-inch food-grade hose, an Autosiphon can move 23 liters of wine in three or four minutes.
This device is highly recommended.
The only drawback to an Autosiphon is that it consists of a number of parts — be sure to sterilize it thoroughly before you use it. Run sulfite solution over the exterior of the device, and pump some through its workings and then repeat the procedure with clean water to remove the sulfite.
To rack your wine, lift your primary fermentor onto a table or counter. Place a sterilized carboy on the floor below it. Lower a sterilized Autosiphon with a suitable siphon tube attached to it into your primary fermentor — disturbing the sediment at the bottom of your primary fermentor as little as possible — and start the siphon. This is an undertaking that’s vastly simplified if two people attend to it, one to keep the Autosiphon in place, and the other to manage the lower end of the tube. When your primary fermentor is almost empty, you can tilt it slightly to allow the end of the Autosiphon to remain below the surface of your wine for as long as possible.
It’s arguably worth mentioning that racking your wine from your primary fermentor to a carboy will leave most of its sediment behind — a few flakes will inevitably be drawn up your siphon and wind up floating in your carboy. This isn’t an issue.
When you’ve finished racking your wine, fit an airlock into a rubber carboy bung. Fill the chambers of the airlock half-full with sulfite solution — if you look carefully, you’ll probably find a fill line molded into the plastic of your air lock. Sterilize the bung and fit it into the neck of your carboy.
Wheel your filled carboy into the abode formerly occupied by your primary fermentor, and leave it to its own devices for at least twelve days.
If you lined your primary fermentor with a plastic bag, as discussed earlier, you can remove the bag and a considerable volume of pretty disreputable-looking sediment therein, and trash the filthy thing. If you fermented your wine directly in your primary fermentor, plan on some scrubbing.
You should also clean whatever technology you used to siphon your wine. It’s worth running sulfite solution through your siphon now, to prevent anything from growing therein while you’re not looking.
While your wine is no longer in its primary fermentor, it will continue to ferment in your carboy. Depending on your choice of wine, you’ll probably notice bubbles working their way through the air lock in the neck of your carboy. This is as it should be.
GAS SHORTAGE
After twelve days in your carboy, your wine should be ready to degas. You should see no bubbles rising through the airlock in the neck of your carboy. The specific gravity of your wine should be below 0.995, as measured with a sterilized hydrometer. This last issue can prove to be a bit complicated, in that it’s pretty well impossible to read a hydrometer once it’s been dropped through the neck of a carboy, ’specially if you use a carboy made of opaque plastic. I’m not sure how you’d fish the little brute out of a carboy, either.
In practice, if your carboy has been in a warm room and nothing has spoiled your batch of wine due to poor sterilization earlier in the adventure, you can safely proceed to degas it if there is no activity at your airlock. Unless you’re in a raging hurry, you might want to leave things for an extra day or two to ensure that fermentation is genuinely complete.
Once all activity has ceased to your satisfaction, rack your wine from the carboy its in to a second — sterilized — carboy, using whatever siphon technology you employed to rack it the first time. Your wine kit will have come with a packet of sodium metabisulfite, which should be added to your wine after it has been racked. Sodium metabisulfite will kill any yeast left in your wine that hasn’t previously had the grace to snuff it through natural causes, and bring about the immediate cessation of fermentation. Without the addition of sodium metabisulfite, your wine would continue to ferment, resulting in vinegar, sludge and a crushing disappointment.
If you only own a single carboy, you can rack your wine into a sterilized primary fermentor, add sodium metabisulfite to it and then rack it back into your carboy. This tends to waste a bit more wine than using two carboys would.
You’ll need to stir the sodium metabisulfite with your wine once it’s been racked, which will require something narrow enough to fit through the neck of a carboy — few large spoons are sufficiently thin to manage it. Most winemaking shops will sell you a dedicated carboy spoon for this purpose.
You can now sterilize the bung of your airlock and return your wine to its slumber.
For the next two or three days, you’ll need to stir your wine three times per day. This is a decided nuisance, as it involves repeatedly sterilizing your hands and whatever you intend to stir it with, and then sterilizing your airlock bung to replace it in the neck of your carboy. Deal with it — it’s just part of the grand craft of winemaking.
Once two or three days have elapsed — this is usually determined by the proximity of the next available weekend in our house — you can wheel your carboy out into the light for one last taste of chemistry. Your wine kit will have included a packet of potassium sorbate — mix it with half a cup of warm water in a sterilized measuring cup and pour it into your wine, stirring the works for a minute or two to make sure it’s properly mixed. Potassium sorbate inhibits yeast molds once wine has been bottled, which might otherwise spoil your wine and create enough gas pressure to blow your corks into low orbit.
The astronauts on the International Space Station will not thank you for bombarding them with corks.
Your wine kit will likely also have come with a bag of fining agent, typically Isinglass, which should be added as well. Isinglass is a fish byproduct, and it’s arguably the most effective and least objectionable substance for fining wine. Some wine kits use decidedly less agreeable fining agents, such as egg whites or gelatin. If you’re concerned about these things — and they certainly gross me out — you should check the ingredients list of a prospective wine kit before you crush your plastic.
The fining agent in wine binds with phenolics, substances in the skins of grapes that would make your wine bitter if they were permitted to stick around. Ultimately, your fining agent and whatever gets attached to it will settle out of your wine as sediment.
Once you’ve added the final ingredients to your wine, fit a sterilized bung to your carboy and leave the whole works for about a week. During this time, you can scare up at least 23 liters worth of wine bottles, and a suitable number of corks.
Winemaking shops will sell you appropriate corks for bottling wine. In most cases, you’ll want number eight corks. Don’t try to reuse old corks when you’re bottling your wine. Buy a few more corks than you think you’ll need, should one or two get mangled in your first attempts to operate a corking machine.
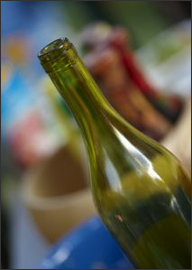
You can buy suitable 750-milliliter wine bottles at most winemaking shops, and unless you’ve been particularly diligent about hanging onto your empty commercial wine bottles, you’ll probably have to do so to some extent. This said, you can bottle your wine in any extant corkable wine bottles you have on hand.
As a rule, non-sparking wine that isn’t sold in cardboard boxes or pop-top cans arrives in one of two types of containers — corked bottles or screw-cap bottles. Bottles manufactured for use with corks typically exhibit thicker glass, and a still thicker glass ring molded into the tops of their necks to prevent their necks from splitting while they’re being corked. Bottles intend for use with screw caps use thinner glass, and they usually lack neck reinforcements.
In theory, you can successfully cork either type of bottle. In practice, pressing a cork into the neck of a screw-cap bottle runs the very tangible risk of splitting the bottle, wasting a lot of wine and flooding your kitchen. Considering the modest cost of proper corkable bottles, this never looked like a worthwhile risk to me — your mileage may vary.
If you’ll be reusing commercial wine bottles, you should soak them in warm water for a day to remove their labels and make cleaning them easier. A bathtub is a useful vessel for doing so.
BOTTLING AT LAST
Bottling homemade wine is arguably the most enjoyable part of the craft of creating it... and potentially the messiest. You can preclude the latter eventuality with some simple technology and a bit of forethought.
It’s arguably worth mentioning that bottling wine involves a lot of sulfite solution, or more correctly, the same bottle of solution used extensively. Everything involved needs to be sterilized, most notably your bottles.
As was noted in the previous section of this article, you should assemble enough suitable wine bottles to contain at least 23 liters, or six US gallons, of wine, and enough hitherto unused number eight wine corks to cork them up once they’re full. Remove the labels from any commercial bottles, and make sure they’re all reasonably clean. If you’re recycling commercial wine bottles, check them out for any chunks of sediment or intoxicated insects lurking within.
You should also check your bottles for chips and cracks around their necks, and discard any that aren’t free from imperfections.
While you can use either clear or colored glass bottles to contain wine, keep in mind that wine can deteriorate in the presence of strong light. Especially if you have to purchase bottles, dark green ones are preferable.
Much of the process of bottling homemade wine involves cleaning and sterilizing your bottles. Specifically, you’ll need to rinse each bottle with sulfite solution, and then with clear water to remove the sulfite, which would spoil your wine. You can do this by filling each bottle with sterilizing solution, emptying it, filling it with water and then emptying that... or you can use technology.
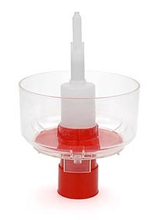
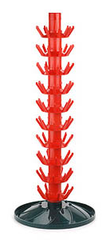
All of the following toys should be available at your local winemaking shop.
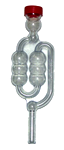
The device to your right is an Avvinator, made in Italy by Ferrari — I’m reasonably certain it’s not the same company that builds sports cars. The Avvinator consists of a plastic bowl with a simple mechanical pump in the center. Fill the bowl with about a liter of sterilizing solution, overturn a bottle and push it down over the pump... and a jet of sulfite solution will squirt up into the bottle. The Avvinator will sterilize enough bottles to deal with a whole batch of wine in five or ten minutes, and it’s mildly entertaining to use.
In theory, once you’ve sterilized all your bottles with an Avvinator, you could replace the sterilizing solution therein with water and wash them using the same device. In practice, this is somewhat questionable, as the water would quickly acquire a substantial sulfite component. It’s preferable to use fresh water for each bottle. More technology is called for.
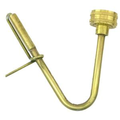
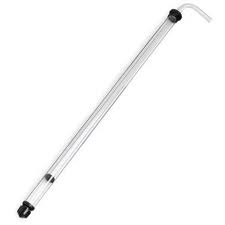
The odd bit of hardware shown here may look like it fell off a ’57 Studebaker, but it’s actually a clever little brass valve. Wound onto a threaded laundry tube faucet, it will remain shut off until a wine bottle is held over the bit that protrudes from the valve, at which time a jet of water will surge into the bottle and wash away any sulfite solution that remains therein. Like the Avvinator, this thing will get through a whole batch of bottles in minutes, and it won’t leave its operator dripping wet. Note that you will need to have at least one faucet in your house with a threaded end to use this thing.
Finally, a bottle drying tree will persuade your bottles to dry as quickly as possible, by maintaining them at an angle conducive to all the water remaining within them dripping out. Be sure to sterilize all the plastic parts of the drying tree that might come in contact with your bottles before you use it.
While your kitchen is awash in sulfite solution, don’t forget to sterilize your wine corks, and then rinse them in fresh water.
Bottling wine involves siphoning it from the carboy in which it resides at the end of the fermentation and degassing process into bottles. Once again, you can accomplish this with very simple technology if you’re on a serious budget or if you miss the twentieth century, but as with everything else involved in making wine, there’s a handy bit of plastic available to make the whole undertaking easier.
The tricky aspect of bottling wine with a siphon is not allowing the wine to rush into your bottles with sufficient enthusiasm to cause the resulting drink to foam, and temporarily pausing the flow of the siphon between bottles so your kitchen doesn’t wind up requiring channel markers. Both of these issues can be addressed with a bottling tube, a short length of rigid food-grade plastic pipe with a valve in the end. The valve will stay closed until it’s pressed into the bottom of a wine bottle.
Our plumbing for bottling wine, then, involves an Autosiphon, a length of food-grade flexible tube and finally a bottling tube. Once the siphon gets going, each bottle can be filled by pushing the end of the bottling tube into it until the level of wine reaches the bottle of the neck of the bottle, and then withdrawing the tube, closing the valve. It’s possible to bottle 23 liters of wine this way without spilling a drop.
Be sure to sterilize everything, including the bottling tube, before you start.
Once again, bottling wine is a lot easier if it’s undertaken by two people — one to manage the bottling tube, and the other to keep track of the siphon in your carboy and juggle bottles as needs be. Some planning to assure easy access to the bottles to be filled will keep the whole undertaking from degenerating into a swamp.
One of the issues you’ll probably encounter in discussions of bottling wine is that of filtration. Prior to bottling your wine, you can optionally run it through a pressurized filter system to trap any remaining sediment. The result of doing so will be flawless, clear wine comparable to anything that might arrive from your local liquor emporium.
It’s worth noting that filtering is largely a cosmetic issue — it won’t improve the flavor of your wine. In fact, especially for red wine, filtering can compromise the aroma and body of wine, depriving it of some of its taste. In addition, even simple filtering systems are fairly expensive, and they require a substantial amount of work to clean and maintain them.
One of the reasons that homemade wine typically has a far more robust and engaging taste, compared to its commercial cousins, is that commercial wine is invariably filtered to within an inch of its life.
If you choose not to filter your wine before you bottle it, you’ll probably want to adopt the traditional practice of decanting it through a suitable filter — cheesecloth is traditional, we use paper coffeemaker filters — to remove any remaining sediment just prior to drinking it. A funnel and a suitable glass decanter will be of assistance in this undertaking. This is, in fact, how wine was prepared until about the middle of the last century.
When all your bottles have been filled with wine, you’ll need to cork them. Inserting corks in wine bottles has been the object of a lot technology over the past few centuries, and most of it worked really, really badly. Corking machines that attempt to clamp themselves to the neck of a bottle and drive corks into place with two handles seem as if they should perform the task effortlessly. The resulting heaps of shattered glass could probably be seen from space.
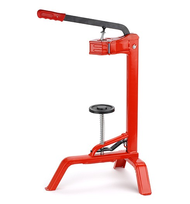
The device illustrated here is a floor corker. I don’t know who makes it, as it doesn’t have an identifiable brand name stamped on it — it’s manufactured in Portugal. Most winemaking shops sell these things, and they’re easy to find on line. I suspect that this machine was the culmination of years of tinkering — it inserts corks into wine bottles with flawless, effortless perfection, and it never breaks anything.
Some winemaking shops will loan you a corking machine, which is a convenient option for your first few batches of wine. This said, the winemaking shop we frequent sells these corkers for about sixty dollars, which was equivalent to the cost of the gasoline to collect and then return the loaned corker for three or four batches of wine.
The floor corker is deceptively simple. Place a wine bottle in the spring-loaded clamp under the cork holder, drop a cork into the opening at the top of the machine and draw the handle down. The cork holder contains a clever mechanical iris that’s operated by the handle — the iris positions the cork over the neck of the bottle held in the machine, such that by the time the handle reaches your cork, the cork won’t have anywhere to go but straight down.
The corking machine has one adjustment, a threaded rod connected to the handle which will allow you to fine-tune the depth of the stroke, and hence how far each cork is pressed into its bottle.
Accept no substitutes — these devices are brilliant.
Once you’ve corked all your wine, you’ll want to find somewhere dark and cool to store it. Lay your wine bottles on their sides. Leaving your wine to contemplate the universe for a few months will permit it to recover from the shock of bottling, integrate its flavors into a complete taste and filter out any remaining sediment. The time required to allow a batch of homemade wine to mature is a matter of some speculation — we like to leave ours alone for at least two months.
One of the aspects of commercial wine that tends to deaden its taste to some extent is a considerably greater sulfite content than is common in homemade tipples. Sulfites in this capacity serve as preservatives, to prevent wine from spoiling due to renewed yeast activity or bacteria. Commercial wine requires a shelf life of several years — homemade wine is typically consumed within months of fermentation.
While it’s a rough guess at best, you can safely store homemade wine for about six months, allowing for the amount of sulfite included with a wine kit. Should you anticipate storing a batch of wine for significantly longer than this, you should purchase some bulk potassium metabisulfite from a winemaking shop and increase the amount of sulfite in your wine before it’s bottled. The instructions included with Vineco’s wine kits suggest adding one quarter of a teaspoon of potassium metabisulfite to a batch of wine destined for an extended slumber.
As a final note, if you own a nice printer, you can craft yourself a suitable label for your basement winery and use self-adhesive Avery labels to grace your bottles. The catch in doing so will be the requirement to peel those labels off your bottles the next time you want to use them — quite laboriously in some cases. Alternately, you could print to really cheap self-adhesive laser labels, which are wont to peel themselves, possibly leaving your bottles in a state of anonymity.
A box of cardboard shipping tags with strings is a good substitute for sticky labels. They don’t look anywhere near as cool, of course, but you can just tie them around the necks of your bottles and remove them effortlessly when they’re no longer applicable — no soaking, scraping or profanity will be required.
SLAINTHE
If you protest the preposterous levels of tax demanded of the citizens of most of the western world, someone will invariably insist that you’re an ungrateful, selfish bastard, and observe that those taxes pay for all manner of worthwhile government programs. This is true as far as it goes, and if you enjoy government services such as frog population management, foreign aid to the uninhabited island of Nikumaroro, midwestern golf course reconstruction, vocational retraining for underwater cheese sculpture technicians, senatorial junkets to review the five-star accommodations of Fiji, grants for the formation of a museum to preserve the early history of steam-powered automobiles, enhanced public-sector retirement benefits or UN peacekeeping forces to defend the banking sector of Luxembourg, you should certainly pay your taxes with a smile and get used to eating Kraft dinner three or four nights a week.

Alternately, should you come to the conclusion that tax freedom day should occur in your jurisdiction some time well before the summer solstice; that having worked to earn your money you should be the arbiter of how it’s to be spent; and that most of the funds given to governments are ultimately spent on governments, you might wish to consider a few modest efforts to mitigate the crushing weight of your current tax burden.
Detaching yourself from the taps of commercial wine suppliers is unlikely to either radically change your finances or prompt any level of government to mitigate its wanton spending, but it’s a beginning. A journey of a thousand miles begins with a single step, and it need not be undertaken with armloads of empty wine bottles to be returned for their deposits.
We estimate that making our own wine saves us about five-thousand dollars a year, almost all of it in tax. Upon consideration, we’re certain we can use the money more wisely than our various governments.
While it calls for some modest initial credit-card abuse and a few hours of work per batch, wine making is enjoyable, satisfying when you finally get to uncork the stuff and tasty. Brew your own wine and you’ll be free to raise a glass whenever you feel like it, and not hear an annoying little accountant in your head reminding you what it cost.
While the prospect remains decidedly unlikely, if everyone began brewing their own wine, the governments responsible for drowning commercial wine in taxes would arguably be compelled to pay attention. It’s possible that they’d try to enact some manner of grape juice tax, of course... or a yeast surcharge, a potassium metabisulfite tarif, a carboy levy or a siphon tube environmental management fee... but there is always the unthinkable, hitherto unheard of eventuality that they’d come to their senses, and actually cut their spending just a bit.
We’re indebted to the staff of Huntsville Wine and Beer for their ongoing wealth of experience, advice and big boxes of grape juice concentrate and yeast. If you ever find yourself this far north, they’re just up the road from the post office, beside the gun shoppe.
The link graphic at the Articles page is by lockstockb, used under license from freeimages.com.
|
PLEASE DON'T COPY THIS PAGE
The contents of this page are copyright © 2003 — 2026 Alchemy Mindworks. Some portions are copyright © 2003 — 2026 Steven William Rimmer. The copyright holders specifically prohibit reproduction, transmission, duplication or storage of this page or any portion thereof in any electronic or physical medium, under any circumstances. Reproducing all or part of this page against our express wishes may result in severe civil and criminal penalties. The lawyers made us say that.
Please contact us for reproduction rates if you'd like to reproduce all or part of this page on paper. If you like this page and wish to share it, you are welcome to link to it, with our thanks.
|